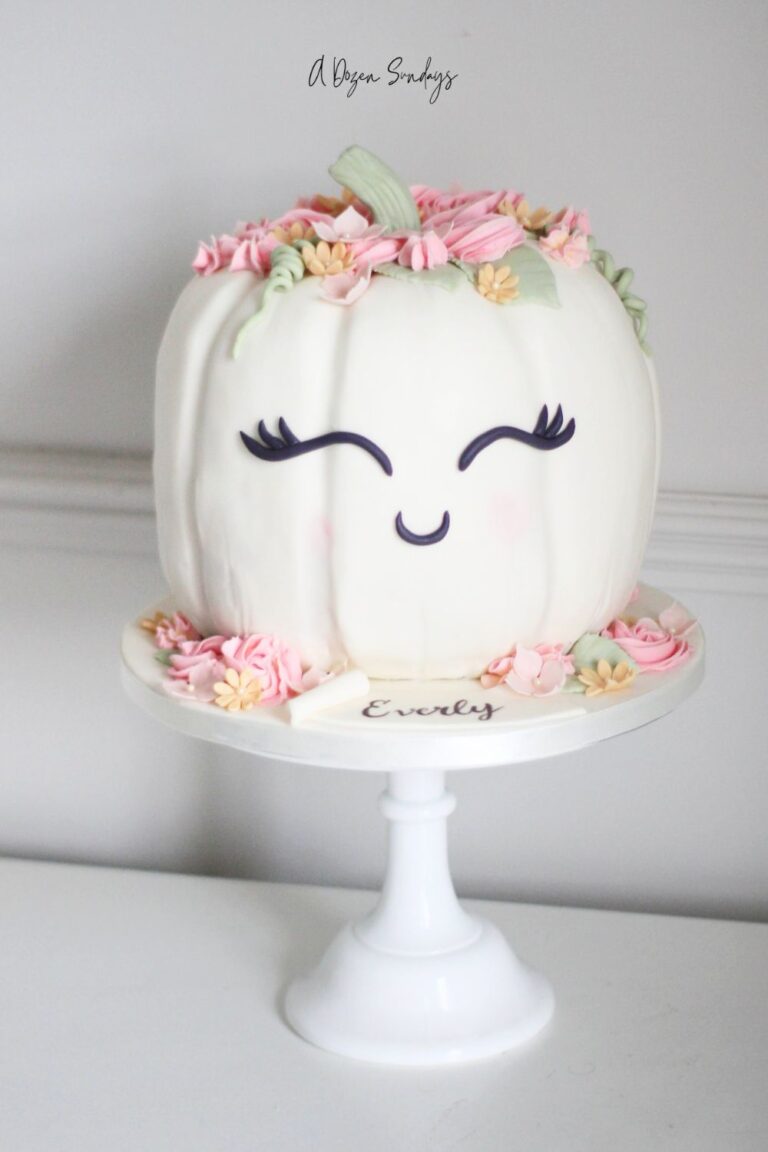
Jellycat Birthday Cake
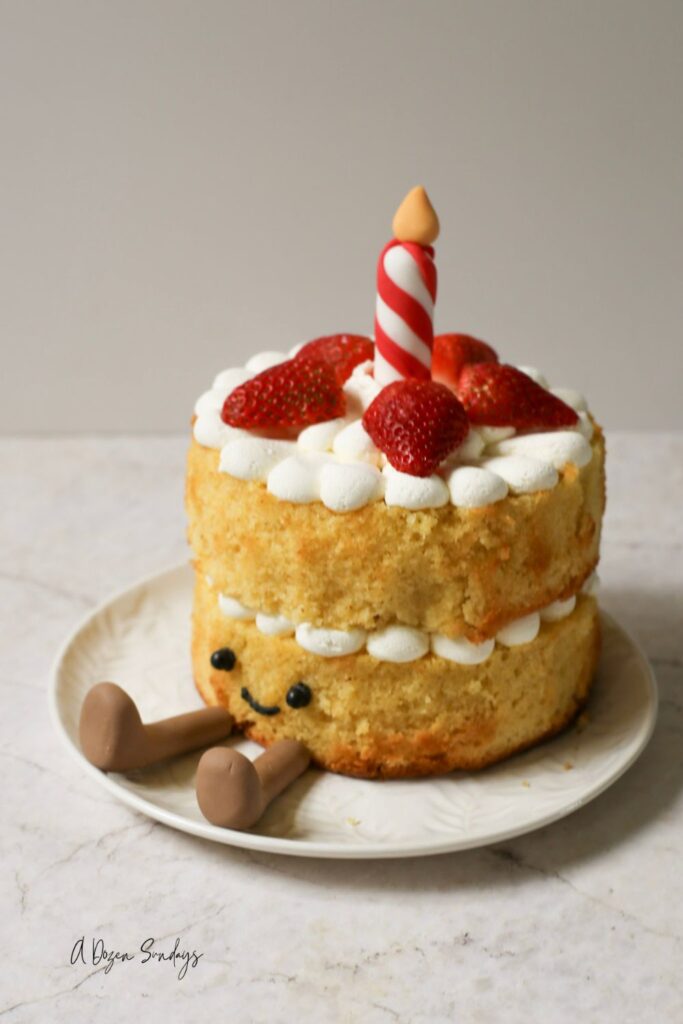
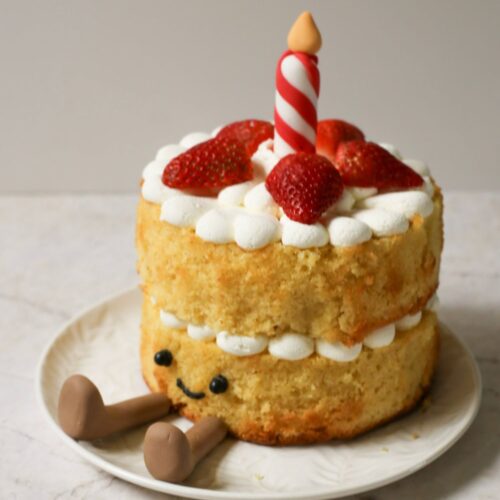
My daughter loves all things Jellycat, and asked for a replica of the Jellycat Birthday Cake for her birthday this year. It’s so cute!

I made this version of the Jellycat birthday cake from a classic Victoria Sponge recipe, topped with fresh strawberries. As the cake would be sat out on the table for the duration of her party I used vanilla buttercream rather than the traditional whipped cream filling, but still kept the traditional strawberry flavours by using strawberry jam in the filling and fresh strawberries on the top. I used a 6 inch cake tin to get the extra height on the cake layers that the soft toy has, and because she was only having 6 guests to the sleepover and I didn’t want a load of cake in the house because, well, I would eat it.
Why You’ll Love This Recipe
- It’s a classic for a reason – The Victoria Sandwich is a beloved British bake, and this version is as timeless and crowd-pleasing as ever.
- Light, fluffy sponge – Thanks to the perfect mix of butter, eggs and self-raising flour, you get a tender, airy cake every time.
- Easy to make – No fancy ingredients or complicated steps. Just simple baking with delicious results.
- Super cute cake – This simple cake is so easy to make and it’s so blooming cute! You don’t need any expert cake decorating skills to create a cute Jellycat birthday cake.
- Perfect for any occasion – Afternoon tea? Birthday treat? Just fancy a slice with your cuppa? This recipe has you covered – it’s versatile enough to be an everyday cake, without the decorations.
What You’ll Need to Make This Cake:
Caster Sugar: This fine sugar dissolves quickly into the batter, giving your sponge that soft, delicate crumb and perfect level of sweetness.
Softened Butter: Butter is the magic behind a rich, buttery flavour and beautifully soft texture. Make sure it’s nice and soft so it creams easily with the sugar – butter straight from the fridge won’t mix well.
Eggs: Eggs help bind everything together and add structure to your sponge. They also help keep the cake light and fluffy.
Self-Raising Flour: No need to faff about with raising agents—this flour already has some mixed in! It gives the cake height and that lovely soft sponge texture.
Baking Powder: Just a little extra lift to make sure both layers rise evenly and are perfectly airy.
Milk: A splash of milk loosens the batter slightly and keeps the sponge moist and tender.
Butter: This forms the base of your buttercream. Softened butter is key for a smooth, creamy texture that spreads easily between the cake layers.
Icing Sugar: Sifting helps avoid any lumps in your buttercream and gives it a light, fluffy finish. Paired with butter, it makes a sweet, smooth filling.
Vanilla Extract: Just a tiny bit adds warmth and flavour to your buttercream, giving it a richer, more rounded taste—totally optional but lovely if you have it.
Strawberry Jam: A classic pairing with the buttercream in a Victoria Sandwich. Go for a good-quality jam with chunks of fruit if possible—it adds sweetness, a touch of tartness, and a gorgeous pop of colour when you slice into the cake.
Jellycat Birthday Cake
Equipment
- Baking Paper/Greaseproof Paper
- Small Knife
Ingredients
- 300 grams caster sugar 1 1/4 cups
- 300 grams butter, softened 1 1/4 cups
- 6 medium eggs
- 300 grams self raising flour 2 1/2 cups
- 2 teaspoons baking powder
- drop vanilla extract
- 4 tablespoons milk
For the Filling:
- 200 grams unsalted butter 3/4 cups and 2 tablespoons
- 400 grams icing sugar 1 1/3 cups
- drop vanilla extract
- half a jar strawberry jam
- 4 strawberries
- black food colouring
- 50 grams sugarpaste
- red food colouring
- yellow food colouring
- brown food colouring
Instructions
- Preheat your oven to 190ºC (170ºC fan) / Gas 5. Grease two 6-inch sandwich tins with butter and line the bases with non-stick baking paper. If you only have one tin, half the recipe and make it twice i.e. mix up 150grams of everything and 3 eggs, then repeat.
- In a stand mixer or large mixing bowl, beat together the caster sugar and softened butter until light and fluffy. Add the beaten eggs, self-raising flour, baking powder, and milk, then mix everything until you’ve got a smooth, soft batter. Take care not to overmix though.
- Spoon the mixture evenly into the two tins (or one tin) and level the tops with a spatula or the back of a spoon. Bake for around 35–40 minutes, or until the cakes are golden and spring back when gently pressed.
- Once baked, carefully turn the cakes out onto a wire rack and leave them to cool completely.
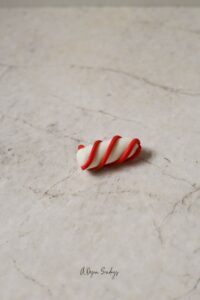
- While the cakes are cooling, you can get creative and shape the candle and legs from sugarpaste.
- Roll a white sausage of sugarpaste and set aside. Roll a thin red sausage of sugarpaste and wrap around the white sausage. Roll them both together to get the swirl effect. I like to use a cake smoother to get an even thickness.

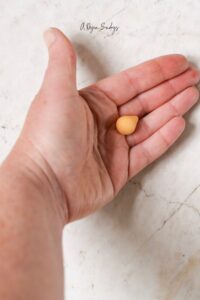
- Make the candle flame from some yellow sugarpaste. Roll a ball of sugarpaste in your hand and then use your index finger of the other hand to create a teardrop shape.
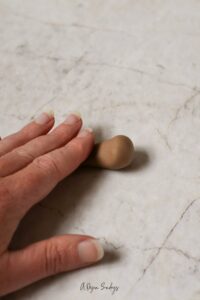
- Make the legs from brown sugarpaste. Roll a ball of sugarpaste then using your index finger of the other hand roll one end of the ball against the work surface to create a leg and foot. .
- To make the buttercream filling, beat the softened butter until smooth and creamy. Gradually mix in the sifted icing sugar, and add a drop of vanilla extract if using. Set aside a small spoonful of the buttercream and colour it black for the face.
- If the cakes have baked a little dark, don't worry. You can trim off the darker edges using a sharp knife. I trimmed the top and bottom of each of my cake layers too – this ensures they're nice and level before you start adding the filling.
- Place one cake layer onto a serving plate. Pipe or spread the white buttercream over the top, followed by a generous layer of strawberry jam. Gently place the second sponge on top.
- Pipe more buttercream on the top of the cake, then decorate with the sugarpaste candle and legs, and use the black buttercream to pipe the eyes and smile.
- Cut the fresh strawberries in half and place them on the top of the cake. The soft toy uses 5 halves, so have a little snack of the leftovers!


The Best Black Food Colouring for Buttercream
My favourite black food colouring for buttercream is Colour Mill Oil Based food colouring. As it’s oil based, it mixes in really well with the buttercream and you don’t need much to get a vibrant black colour.
I hope this tutorial helps! Have you made your own Jellycat Birthday Cake yet?