Easy Ganache Recipe
Ganache is one of those things that seems a bit mysterious, but is actually easier to make than you think. It’s a staple in most professional bakers kitchens. You want super sharp edges on your fondant covered cakes? You’ll need chocolate ganache for that. But how do you make chocolate ganache, and how do you know which chocolate ganache recipe to use? This quick guide to chocolate ganache for cake covering will help!
What is Chocolate Ganache
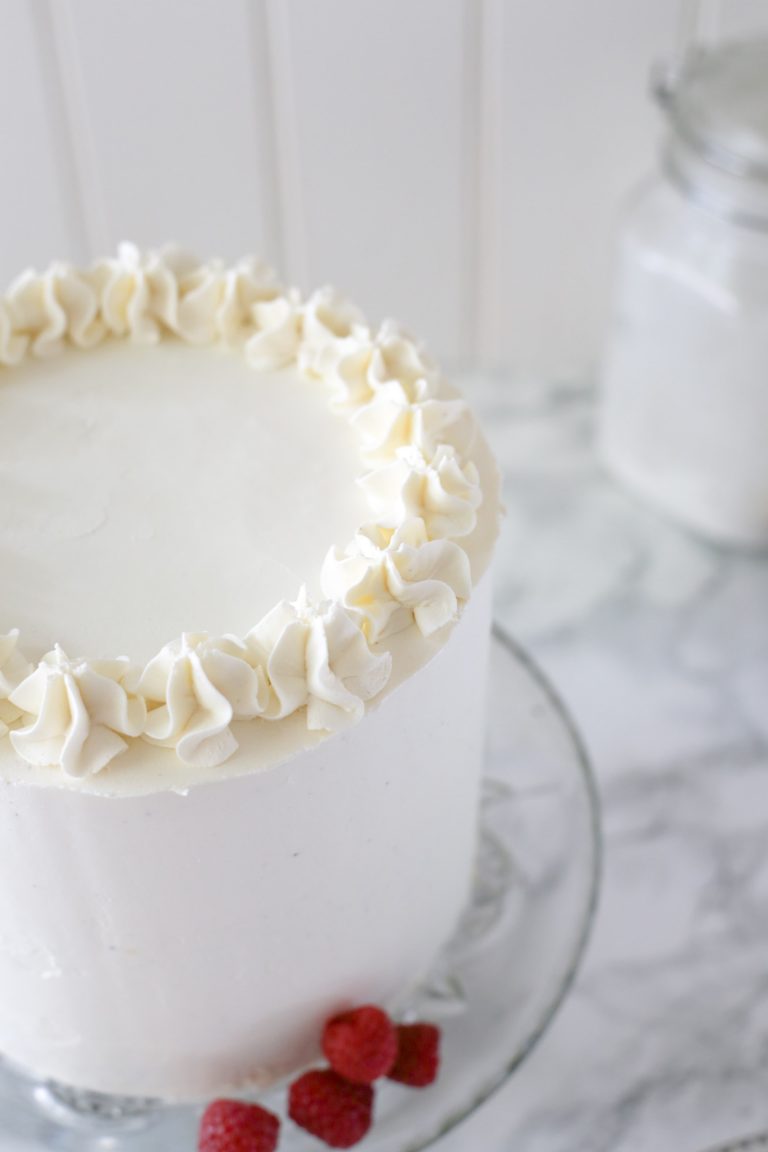
At it’s most basic, chocolate ganache is a mix of two ingredients – chocolate and double cream. It’s used for fillings in cakes and tarts, but professional cake makers also use it as a coating to get super sharp edges on their cakes. As chocolate ganache sets pretty hard it means it can form sharp edges and get that professional finish. You can make chocolate ganache using white chocolate, milk chocolate or dark chocolate, depending on the cake recipe you’re using. I used to use white chocolate the most as it didn’t show through the icing, but it’s personal choice and you can choose a complimentary flavour to suit the cake recipe you’re decorating.
Easy White Chocolate Ganache Recipe
This is the most used of the chocolate ganaches in my kitchen. You can use white chocolate ganache to coat a cake or to make cake pops, cakesicles, truffles or tart fillings. Some bakers feel that the more expensive chocolates make better ganache, but I always found the cheaper ones to be just as good. The ratio of chocolate to cream for white chocolate ganache is 3:1, so for every 10ml of cream you have you’ll need 30g of white chocolate.
Gently melt the white chocolate, either in a microwave or if (like me) you don’t use a microwave, using a bowl over a pan of hot water. Melt the chocolate gently so it doesn’t scorch.
When the chocolate has melted, pour the cream into a saucepan. Bring to the boil and then gently simmer for 1 minute. Pour over the melted chocolate, and whisk together until well mixed.

Milk Chocolate Ganache Recipe
Milk chocolate ganache is made in the same way as white chocolate ganache, however the ratios of chocolate to cream are different. The ratio of milk chocolate to cream for milk chocolate ganache is 2.5:1, so for every 10ml of cream you have you’ll need 25g of white chocolate.
Gently melt the chocolate, either in a microwave or if (like me) you don’t use a microwave, using a bowl over a pan of hot water. Melt the chocolate gently so it doesn’t scorch.
When the chocolate has melted, pour the cream into a saucepan. Bring to the boil and then gently simmer for 1 minute. Pour over the melted chocolate, and whisk together until well mixed.
Dark Chocolate Ganache Recipe
The ratio of dark chocolate to cream for dark chocolate ganache is 2:1, meaning for every 10ml of cream you will need 20g of dark chocolate.
Gently melt the chocolate, either in a microwave in short bursts, or if (like me) you don’t use a microwave, using a bowl over a pan of hot water. Melt the chocolate gently so it doesn’t scorch.
When the chocolate has melted, pour the cream into a saucepan. Bring to the boil and then gently simmer for 1 minute. Pour over the melted chocolate, and whisk together until well mixed.
Vegan Ganache Recipe
You can make vegan ganache using vegan chocolate and coconut milk – see this fabulous recipe at Nora Cooks for more information.
How to Store Chocolate Ganache
Chocolate ganache can be stored in the fridge for up to 5 days, but you can freeze any leftovers for up to 3 months. To thaw out, leave in the fridge overnight and then heat to your desired consistency.
How to Get Sharp Edges on Cakes
The easiest way to get sharp edges on your cakes, ready for icing with fondant, is to give them a coating of chocolate ganache. Choose the chocolate ganache that complements your cake flavour best.
The ideal consistency for ganache to coat a cake is when it’s like peanut butter. As the ganache cools it will thicken, so leave for about an hour and see how it’s doing. The amount of time taken will depend on the conditions in your kitchen. I always make my ganache the day before I need it, and then gently heat it the next day to the consistency I need.
You’ll need some equipment:
- A cake scraper
- A pair of ganache plates 1/4″ bigger than your cake diameter. For example, if you’re icing a 6″ cake, get 6 1/4″ ganache plates.
- Greaseproof paper
Start by putting your cake on a board the same size as its diameter. Spread ganache on top of the cake in a thin layer approx 5mm thick and add a small square of greaseproof paper. Put one of the ganache plates on the top of your cake, and flip the cake upside down on your work bench.
Add the second ganache plate to the bottom of the cake (so you have a cake sandwich, with a ganache plate on the top and bottom of it). Add a little ganache to the bottom of the cake (now the top, as it’s flipped upside down). Using your cake scraper, go around the cake and make sure the ganache plates are lined up perfectly to give you that nice neat vertical edge and your cake is in the middle of the plates. Leave this to set for 5-10 minutes, and then fill in the rest of the gap between the ganache plates with ganache.
Using your scraper, go around the cake and remove any excess ganache, leaving nice smooth sides. Let your ganache set for an hour (or overnight if you can) – you can put it in the fridge to help it set quicker.
When the ganache has set hard, flip the cake back the right way up. Using a sharp knife or your cake scraper, remove the top ganache plate – it should come away easily because of the greaseproof paper square. Fill in any damage caused by the knife with more ganache and scrape your scraper over the top of the cake to level it.
Pop the bottom ganache plate off, and you should have a lovely cake with crisp, sharp edges, all ready to be decorated with fondant.
How to Fix Split Ganache
You’ll know if ganache has split because it’ll be really greasy and oily with chunks of chocolate floating in it – it looks rank. To fix split ganache, warm the mixture in a bowl over a pan of warm water while whisking it. If this doesn’t work, you could also try whisking in room temperature milk (a spoonful at a time). If this doesn’t work, you could allow the mixture to cool and then reheat it, whisking it together. Split ganache is definitely rescuable!
How to Colour Chocolate Ganache
Sometimes you need a coloured ganache, maybe as an outer finish for a cake or to make a chocolate drip. Chocolate needs to be coloured with an oil based colouring, rather than a gel based one. Using something like Sugarflair colours will cause the chocolate to seize and your ganache won’t work. Use a colouring like Colour Mill which is oil based and you should be able to colour your ganache easily.